500 Series and DAW
By coincidence, most of us start wiring 500 series gear the same week we notice our interface “line inputs” aren’t really line-level. We’ll treat hybrid mixing like a controlled loop: calibrate levels, verify true I/O, map DAW inserts, and measure round‑trip latency so the hardware lands sample‑accurate.
Once we lock the routing and recall workflow, we can push analog color without losing digital repeatability, assuming we avoid one common setup mistake that breaks everything.
- Verify your interface has enough true line-level I/O, then choose a 500-series chassis with adequate slots and power/current headroom.
- Standardize balanced cabling (TRS/XLR) and keep insert send/return paths consistent to minimize noise and routing mistakes.
- In your DAW, name and map each output/input pair as a dedicated hardware insert using a strict 1:1 send/return routing rule.
- Measure round-trip latency with a loopback test and enter hardware insert offsets so external processing stays time-aligned.
- Calibrate gain staging (-18 dBFS ≈ +4 dBu) and document settings/photos to make hybrid recall and multi-pass automation reliable.
What Is Hybrid Mixing and Why Use 500 Series Gear?
Hybrid mixing lets us keep your DAW’s recall, editing speed, and automation while routing select tracks through analog processing for added harmonic density and depth.
The 500 series format makes that analog step practical because we can fit multiple preamps, EQs, and compressors in a compact chassis with shared power and I/O.
It’s also cost-efficient: we expand channel count one module at a time and put hardware only where it audibly improves the mix.
The Best of Both Worlds: In-the-Box Speed vs. Analog Warmth
Although we can mix entirely in-the-box for instant recall, fast edits, and near-zero routing friction, we still reach for analog when we need real transformer saturation, op-amp headroom, and hardware dynamics that react in a musically nonlinear way.
Hybrid mixing lets us fuse analog warmth with digital precision: we keep edits, automation, and session management inside the DAW, then insert 500 series modules only where tone or control matters most.
For workflow optimization, we print or monitor through hardware, level-match, and A/B in seconds. That approach supports sound layering: clean ITB transients plus harmonically dense parallel passes.
We treat hardware as creative processing, not a full-time constraint.

Space and Cost Efficiency of the 500 Series Format
Once we’ve decided to patch analog only where it earns its keep, the 500 series format makes that choice practical by packing high-end preamps, EQs, compressors, and saturators into a compact, rackable chassis with a shared power supply.
That density drives space optimization: one chassis replaces multiple full-width units, reduces cabling sprawl, and keeps I/O runs short for lower noise.
The real 500 series advantages show up in budgeting and iteration. We buy only the modules we need today, then scale slot-by-slot as workflows evolve, turning upgrades into cost effective solutions.
Modular flexibility also lowers risk: we can A/B modules, swap flavors per session, and standardize power and mounting.
Finally, gear accessibility improves because a portable lunchbox brings consistent analog processing to any DAW-centric rig.
Essential Hardware & Cables Required for Hybrid Integration
To integrate 500 series hardware with your DAW, we’ll first confirm your audio interface provides enough true line-level inputs and outputs to route signals out and back without gain staging issues.
Next, we’ll choose a 500 series chassis based on slot count and reliable power/current specs so every module runs within tolerance.
Finally, we’ll standardize the wiring with balanced TRS-to-XLR runs and correct pin/hot conventions to keep noise low and level matching predictable.
Selecting an Audio Interface with Adequate Line-Level I/O
- We’ll feel confident when meters match reality.
- We’ll hear depth return in transients.
- We’ll stop fighting mysterious distortion.
- We’ll enjoy fast, flexible patching.
- We’ll trust every print we commit.
Choosing the Right 500 Series Chassis (Slot Count & Powering)
Two chassis specs determine whether our 500 series rig integrates cleanly with a DAW: slot count and power delivery.
Slot considerations start with channel planning: count the processors we’ll patch simultaneously, then add 20–30% headroom for future modules.
Next, evaluate chassis types, desktop, rackmount, or travel frames, because ergonomics and expansion paths differ.
Power options matter as much as slots: confirm per-slot current, total rail capacity, and regulation stability so high-draw modules don’t sag or induce noise.
We also verify phantom availability only if our modules require it.
Finally, check module compatibility beyond format: some units need deeper enclosures, rear access, or specific grounding schemes.
Balance portability factors against cooling and PSU robustness to keep performance consistent under heavy sessions.

Cable Protocols: Balanced TRS to XLR Cabling Explained
Three cable decisions govern whether our 500‑series rack talks cleanly to the DAW: balanced line level, connector standard (TRS vs XLR), and wiring convention (tip/ring/sleeve mapped to pin 2/3/1).
We’ll standardize cable types so every insert send/return stays predictable. With TRS connectors, tip carries hot, ring carries cold, sleeve is shield; under XLR standards, that’s pin 2 hot, pin 3 cold, pin 1 shield.
If a unit flips polarity, we’ll swap pins 2/3 (or tip/ring) and verify with a tone. Keep runs short, use star-quad where needed, and separate power to reduce audio interference while preserving balanced signals.
Step-by-Step Guide: Routing 500 Series Hardware as DAW Inserts
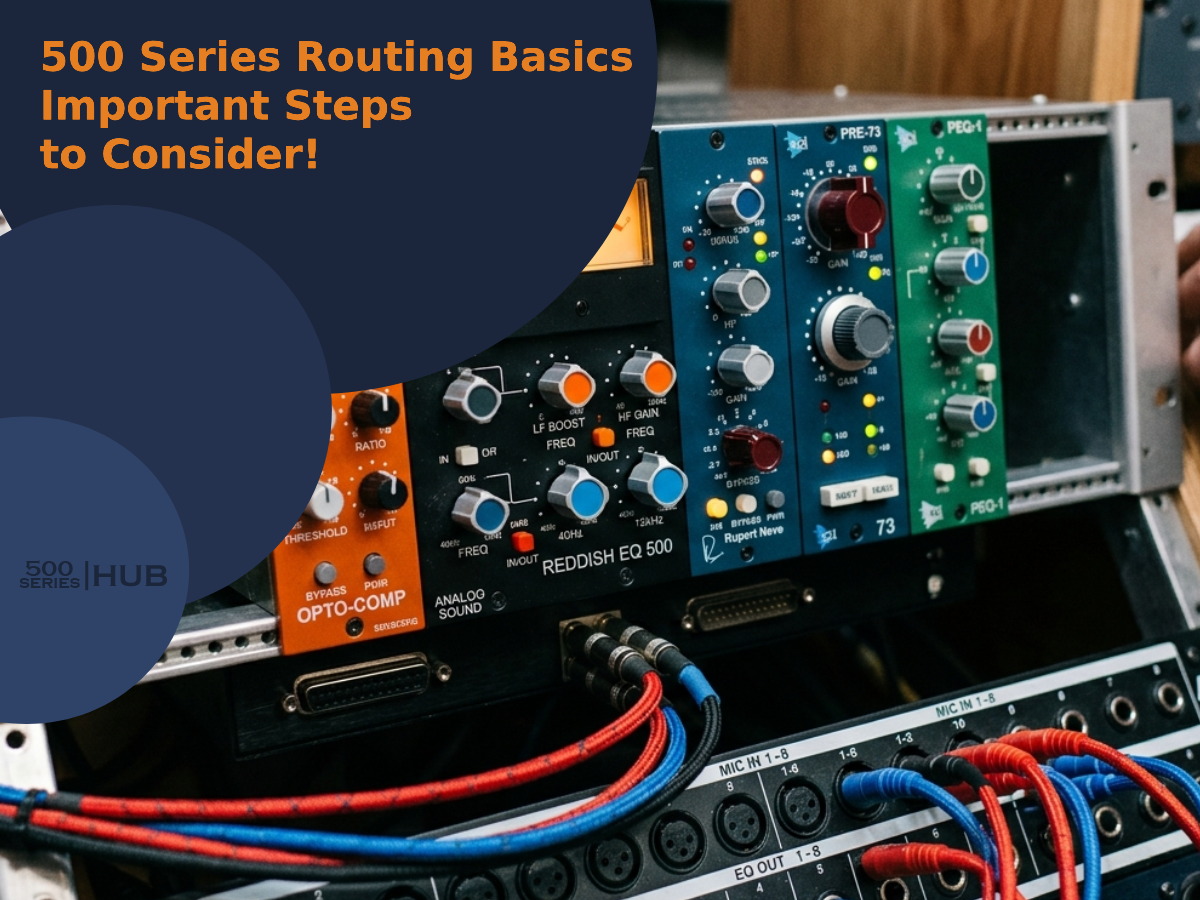
First, we’ll configure a dedicated interface output and input pair, whether you’re on Focusrite, Universal Audio, or RME, so the 500 series slot sees a clean send and return at the correct line level.
Next, we’ll apply the 1:1 hardware insert rule in Pro Tools (and equivalent insert routing in other DAWs) so each insert maps to one physical output and one physical input with no channel mismatches.
Finally, we’ll decide whether to use internal chassis linking for fixed module chains or physical external patching for flexible routing, then verify the loop with a quick tone/latency check.
Interface Output & Input Configuration (Focusrite / Universal Audio / RME)
- Confidence from predictable recall
- Relief when noise floor drops
- Excitement hearing true analog impact
- Trust as meters agree end-to-end
- Momentum from faster hybrid decisions

Understanding 1:1 Hardware Insert Rules in Pro Tools and Other DAWs
One rule keeps hardware inserts in Pro Tools (and most other DAWs) predictable: each insert must use a dedicated 1:1 output-to-input pair, treated as a matched send/return loop.
We assign Output X as the send and Input X as the return, then set the insert on the track so the signal flow stays deterministic. If we break the pair, we invite crosstalk, miscompensation, and messy recall.
| Task | Precision move |
|---|---|
| Insert routing | Map Out 5 → In 5, label it “500 Loop 5” |
| Hardware latency | Measure round-trip, enter H/W Insert Delay (or nudge) |
| Plugin alternatives | A/B gain-match, print the loop for fast recall |
This methodical pairing makes analog integration scalable: every loop is a known path, calibratable, and automation-friendly across DAWs.
Using Internal Chassis Linking vs. Physical External Patching
Although both approaches can satisfy our 1:1 insert rule, internal chassis linking and external patching behave differently in practice, so we’ll pick the method that matches our recall and routing needs.
In a chassis comparison, linking uses the rack’s internal bussing to hard-chain modules; it’s fast, repeatable, and minimizes cable variables. External patching techniques route I/O through a patchbay, giving us granular signal flow control, parallel paths, and rapid A/B across modules, but it adds connection points and documentation overhead.
For innovation-minded integration strategies, we’ll standardize default links for “always-on” chains, then reserve patch points for experiments and exceptions. Our connection options should mirror session intent and how often we reconfigure.
Configuring DAW I/O Setup for Effortless Hardware Recall
Now we’ll lock in a DAW I/O setup that makes 500 series hardware inserts recallable and repeatable.
We’ll map each interface send/return as a named hardware insert so you can re-patch with confidence and reopen sessions without guesswork.
Then we’ll verify automatic latency compensation and calibrate line levels so round-trips stay time-aligned and hit the hardware at the correct operating level.
Mapping and Naming Hardware Inserts in Your DAW
Most of the time, hardware inserts only feel “fiddly” because we haven’t mapped and labeled them with the same rigor we apply to in-the-box routing.
In the DAW I/O matrix, we’ll pair each interface output to a 500-series send, and each return to a dedicated input, then store it as a preset. We’ll apply hardware naming conventions that encode slot, module, and direction (e.g., “500_S3_API525_Send/Ret”), so every insert menu becomes predictable.
These DAW integration techniques strengthen signal flow understanding and make insert management strategies repeatable, session to session, while preserving analog processing benefits without second-guessing routing.
Managing Latency Compensation and Line Levels
When we route a 500‑series insert through the DAW, we’ve to lock two variables at the same time: round‑trip latency and reference level.
First, we measure the loop: send a click to the output, record the return, and set the DAW’s hardware insert offset so latency management stays deterministic across buffer changes.
Then we align gain staging: calibrate line level so -18 dBFS equals +4 dBu (or your chosen reference), and document any pad/trim states on the interface and rack.
Watch plugin delay on the insert track; keep look‑ahead processors post-print, or commit hardware returns to audio.
Finally, choose monitoring techniques: track with direct monitoring, mix with compensated playback, and verify phase by null tests.
4 Practical Hybrid Mixing Applications (With Real Examples)
Now that we’ve locked in repeatable DAW I/O, we can run four hybrid moves that combine 500-series tone with precise in-the-box control.
We’ll glue a drum bus with VCA compression while managing sidechain, thresholds, and gain staging from plugins. Then shape snare with in-series EQ plus transient modification for consistent attack and body.
Next we’ll chain opto compression into tube EQ for vocal polish, and we’ll finish by automating master-bus hardware passes directly on the DAW timeline for recallable improvement.
Drum Bus Glue: VCA Compression with Digital Plugin Control
Two controls: VCA gain reduction in a 500‑series module and DAW‑side plugin automation let us glue a drum bus with repeatable precision while keeping the analog path doing the heavy lifting.
We start with drum compression techniques: 2:1-4:1, 10-30 ms attack, 50-150 ms release, and target 1-3 dB GR on peaks.
With VCA characteristics explained, we lean on fast, low‑distortion control for consistent punch, then automate threshold trims in‑song for glue effect applications without touching hardware.
For parallel processing benefits, we mult the bus, crush the return, and blend to taste while keeping latency compensated.
Snare Shaping: In-Series EQ and Transient Modification
Route the snare through a 500‑series EQ into a transient shaper (or transient‑capable compressor) and we can sculpt tone before we dictate envelope, with every move recallable from the DAW.
We’ll start with snare tuning techniques: confirm fundamental and ring, then notch the offender with tight Q.
Hit practical EQ frequency ranges: 80-120 Hz for body, 180-250 Hz to manage box, 3-6 kHz for crack, 8-12 kHz for air, printing only what we can’t fake in‑the‑box.
Next, we’ll drive transient shaping tools: boost attack 10-20% for articulation, trim sustain to shorten room.
For layering snare samples, we’ll time‑align and high‑pass the layer, then use dynamic control methods (sidechain or attack‑biased compression) so hits stay consistent.
Vocal Polish: Opto Compression and Tube EQ Chaining
Because vocals punish harsh gain staging faster than most sources, we’ll chain a 500‑series opto compressor into a tube EQ and let the DAW handle all routing, recall, and automation.
We’ll print through the chain on an insert, calibrate -18 dBFS = 0 VU, then drive the opto for 2-4 dB GR to stabilize phrasing without pinching transients.
For vocal clarity techniques, we’ll follow with tube EQ: trim 200-350 Hz mud, add 2-4 dB at 3-5 kHz presence, and air at 12-16 kHz, staying inside musical EQ frequency ranges.
We’ll A/B bypass for analog warmth benefits while maintaining signal flow optimization and tight compression settings tips.
Master Bus Enhancement: Automating Analog Hardware in the DAW
Lean on analog hardware the same way we lean on plug‑ins: automate it, repeat it, and recall it without guesswork.
On the master bus, we’ll route a DAW insert to our 500‑series compressor/EQ pair, then print a return track for instant A/B and latency-locked alignment, signal flow optimization first.
For analog automation techniques, we’ll write DAW automation to the insert send level and to a post-return trim, creating chorus lift without touching threshold.
For hardware preset management, we’ll store stepped settings as photos plus recall sheets, then log converter levels so headroom matches session to session.
As mix consistency strategies, we’ll keep GR within 1-2 dB and EQ moves under 0.5 dB. Creative processing ideas: automate mid/side EQ bypass on drops, then re-engage for width.
Frequently Asked Questions
In this FAQ, we’ll standardize how we integrate 500 series modules as DAW hardware inserts and decide when a patchbay is required versus optional.
We’ll quantify and correct round-trip latency so your external analog loop stays time-aligned and phase-coherent in the session.
We’ll also set clear expectations for automation, including what we can control directly in the DAW and what requires recall notes, MIDI/CV, or digitally controlled analog modules.
Q: Do I need a patchbay to use 500 series modules as hardware inserts?
A: When do we actually need a patchbay to run 500 series modules as DAW hardware inserts? We don’t always. With one or two modules, direct connections from interface I/O to the rack often deliver clean, predictable signal flow.
A patchbay becomes smart when we scale, chase repeatability, or need fast reconfiguration. It centralizes I/O, improves labeling, and reduces wear on interface jacks, core patchbay benefits.
We also confirm module compatibility: balanced line level, correct impedance expectations, and whether the chassis exposes individual module I/O or only bus routing. If we want routing flexibility across multiple interfaces, comps, EQs, and parallel chains, a patchbay is the control surface for our hybrid design.
Q: How do I handle latency when using external analog gear in my DAW?
A: Clean routing, whether we wire directly or normalize through a patchbay, doesn’t guarantee time alignment, so we still have to manage round‑trip latency any time we insert 500‑series hardware from the DAW.
First, we measure it: use your DAW’s hardware insert ping, or loop a click through the I/O and read the sample offset.
Then we apply latency solutions: enter the offset in the external insert, or nudge the recorded return.
Keep buffer size low while tracking, then raise it for mixdown to stabilize CPU.
Watch Plugin delay from look‑ahead limiters or linear‑phase EQ; keep delay compensation enabled and avoid bypass mismatches.
For monitoring strategies, we’ll monitor pre‑insert via direct monitoring when needed.
Validate with phase tests, making Real time adjustments per session.
Q: Can you automate analog 500 series gear directly inside a session?
A: How far can we push session automation with analog 500‑series hardware? Not natively, unless the module supports remote control. Most 500 gear is physical vs. digital: knobs aren’t DAW-addressable.
We can still automate results by using analog automation techniques: ride the send level, automate pre/post insert gain, switch parallel blends, and print passes.
For strict signal flow considerations, we’ll document settings, recall photos, and commit stems when moves must repeat.
Final Thoughts: Scaling Your Hybrid Setup
Although a hybrid rig can start with a single 500-series preamp or compressor on an insert, we’ll scale it most effectively by standardizing gain staging, I/O labeling, and recall workflow before adding more modules.
From there, we can evaluate Hybrid scalability options: expand via lunchbox slots, additional AD/DA, or dedicated line-level patching.
Our gear selection strategies should prioritize repeatable utility, clean preamps, flexible EQ, VCA compression then character pieces that suit our mix goals.
Apply budget planning tips by costing cabling, patchbays, and converter channels, not just modules.
Define future upgrade paths with modular power, clocking headroom, and consistent reference levels.
Finally, lock in workflow optimization techniques: templates, loopback latency notes, and photo/metadata recall so sessions stay deterministic.
Conclusion
We’ve now tied our 500 series rack into the DAW like a calibrated loop in a control system: predictable I/O, true line level, and measured latency. With inserts mapped and documented, recall stops being a guessing game and becomes a checklist.
From vocal compression to mix-bus glue, we can patch analog color with digital repeatability. As we scale, we’ll standardize routing, label everything, and expand I/O only when the workflow demands it.
Related Articles
- Rupert Neve 542 Review: Legacy Tape Emulator!
- Elysia xfilter 500 Review: Pro Audio Stereo Equalizer!
- Chandler tg2 500 Review: 500 Series Microphone Preamp!
- SSL G Bus Review: Great 500 Series Compressor Module!
- Radial Workhorse Cube Review: Amazing 500 Series Chassis!
- Pultec EQP-500X Review: Huge 500 Series Program Equalizer!
- SSL Six 500 Series Review: Big Channel Strip in 500!
- Rupert Neve Designs 511 Review: Amazing Mic-Pre!